The brumation refrigerator for refrigerator brumation
For reasons of hygiene and organisation, a “dedicated” brumation refrigerator for our tortoises is necessary, so that the animals can enter brumation there undisturbed. The refrigerator must be placed in a heated room where the temperature is at least 16 °C in winter. Otherwise, the refrigerator thermostat will not work properly. Unheated garages, garden sheds, or cellars are not suitable.
Notes on choosing a refrigerator:
In principle, any reliable standard larder fridge without a freezer compartment and with automatic defrosting is suitable. Such a model is easy to find using a price comparison website.
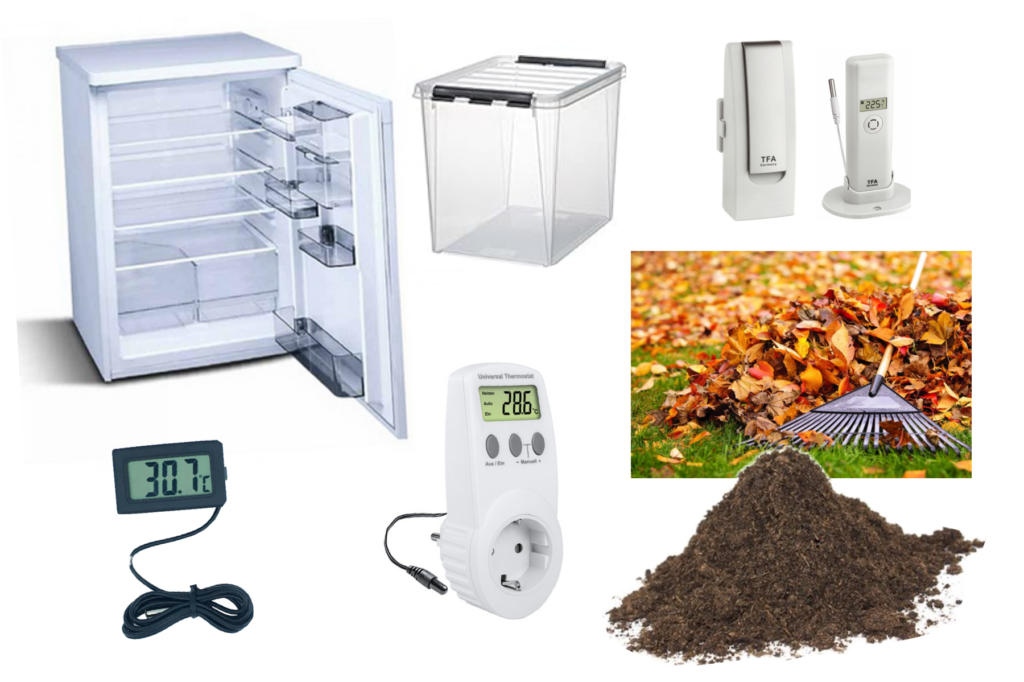
Choosing the refrigerator
Here are the most important search criteria, sorted by relevance:
1.) You need a larder fridge without an ice box or freezer compartment, not a fridge-freezer (because of the risk of the substrate freezing through very quickly if one of these powerful appliances malfunctions). Alternatively, white wine and drinks refrigerators are well suited. There are also drinks refrigerators designed for crates, which suit keepers who need to house many large animals. Euro stacking boxes can also be used in these refrigerators.
With drinks refrigerators, check the adjustable temperature range: it must be possible to reach a minimum temperature of 4 °C.
2.) Choose an appliance that is as wide as possible, so that it will be sufficient for a long time.
It should also be as large as possible, because temperatures are more constant in a large appliance owing to the greater volume of air.
Pay attention to the internal dimensions so that large brumation boxes will fit.
The animals must be able to turn round comfortably in their box and bury themselves completely in the substrate.
Adult and semi-adult animals always need one box per animal, so that they do not disturb each other while burying themselves. Ideally, take the appropriate box with you to the electrical shop and try it out in the refrigerator you want, to see whether there is enough space all round, and especially at the back. The box must not touch the walls of the refrigerator. The door should close easily, and bottle holders should ideally be removable.
Caution: cool boxes, cube refrigerators, and incubators with a cooling function are absolutely not recommended; unfortunately, many accidents have already occurred with them.
3.) Frost-free function (automatic defrosting)
4.) As quiet as possible (low operating noise)
5.) Very good to good reviews (reliability)
6.) Fan function (a useful extra for particularly even temperatures)
The brumation box – safely through brumation
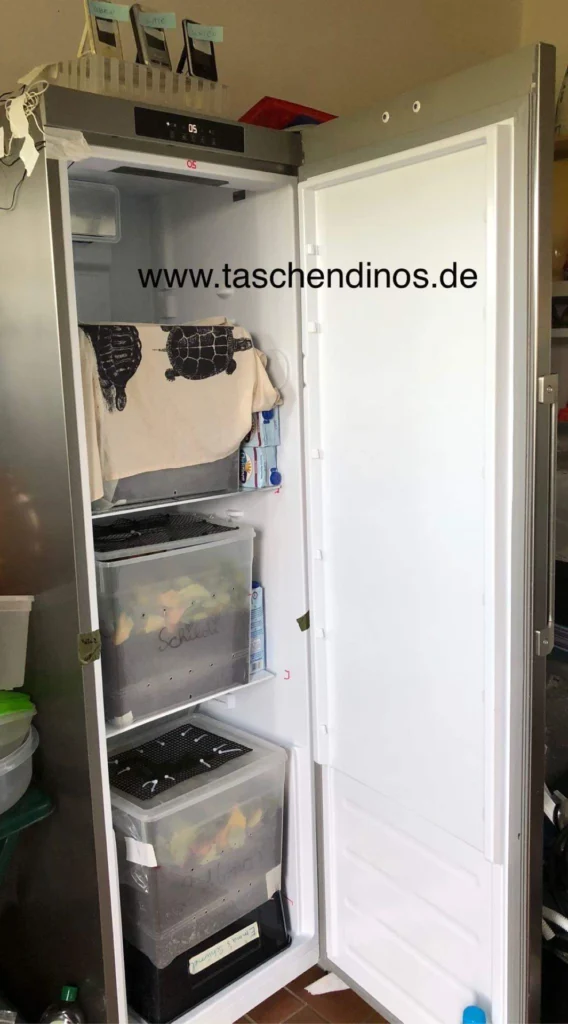
For safe refrigerator brumation, the right brumation box is crucial. The tortoise must be able to turn round in it without difficulty. As a rule of thumb, there should be room for three shell heights of substrate (loose, sieved soil or special tortoise substrate) and three shell heights of dry beech leaves. A generously sized box ensures more stable temperatures – the larger, the better.
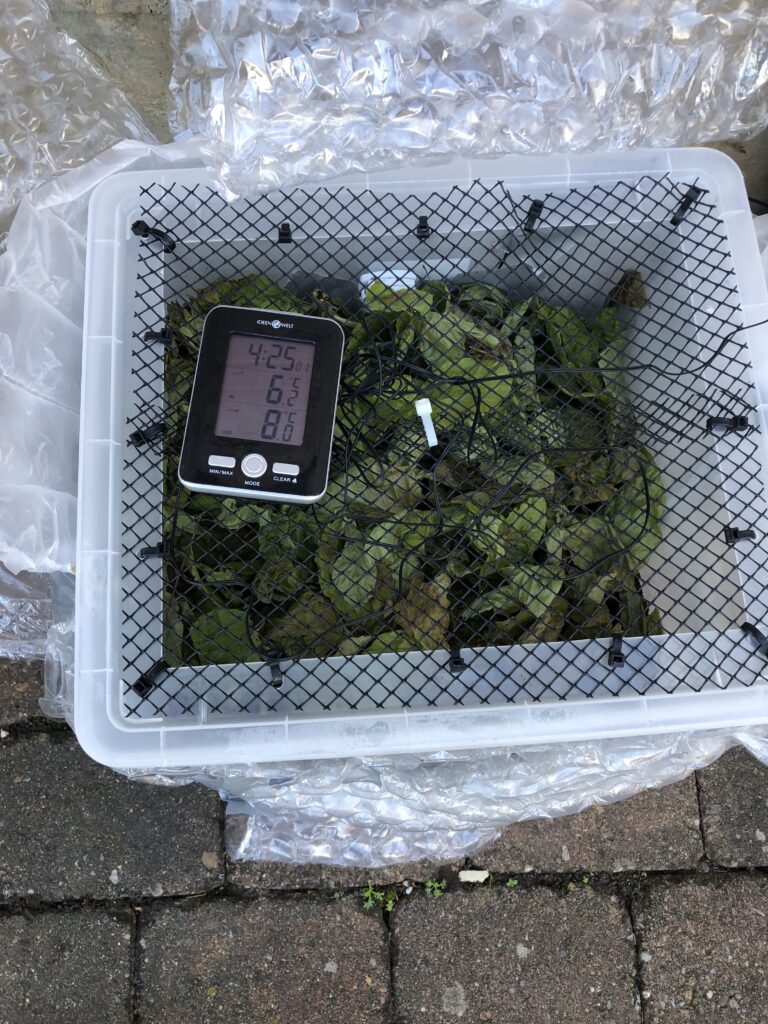
The brumation box should be made of sturdy plastic and chosen so that it does not touch anything in the refrigerator. This protects against freezing and prevents condensation from running into the box. A matching lid is recommended, with a section cut out and replaced with mesh. This prevents the animals from climbing out of the box in the event of a power cut.
To prevent waterlogging, small drainage holes are drilled all round the lower part and in the base. For better insulation, the box can also be wrapped in bubble wrap or foil-backed insulation and fitted with polystyrene at the back to cushion temperature fluctuations.
As a basic rule: each animal gets its own brumation box. Only hatchlings kept together can brumate together in a sufficiently large box, as larger volumes ensure more constant temperatures. The brumation boxes should be checked every year before brumation – both for their condition and for whether the animals still have enough space.
Cleaning the refrigerator
When convenient, we start by cleaning the refrigerators thoroughly with vinegar water.
Then go over them with warm water and washing-up liquid, wipe once with clean water, and dry well.
Make absolutely sure that the drain hole at the back of the refrigerator is clear.
If the shelves wobble too much, they can be reinforced or replaced with extendable oven racks.
Replace any air filters or carbon filters (usually found in refrigerators with a fan function). Carefully vacuum the back of the refrigerator with a furniture brush. Remove dust all round.
Move the refrigerator at least a hand’s width away from the wall.
If it wobbles, adjust the feet. Then check that it is working properly.
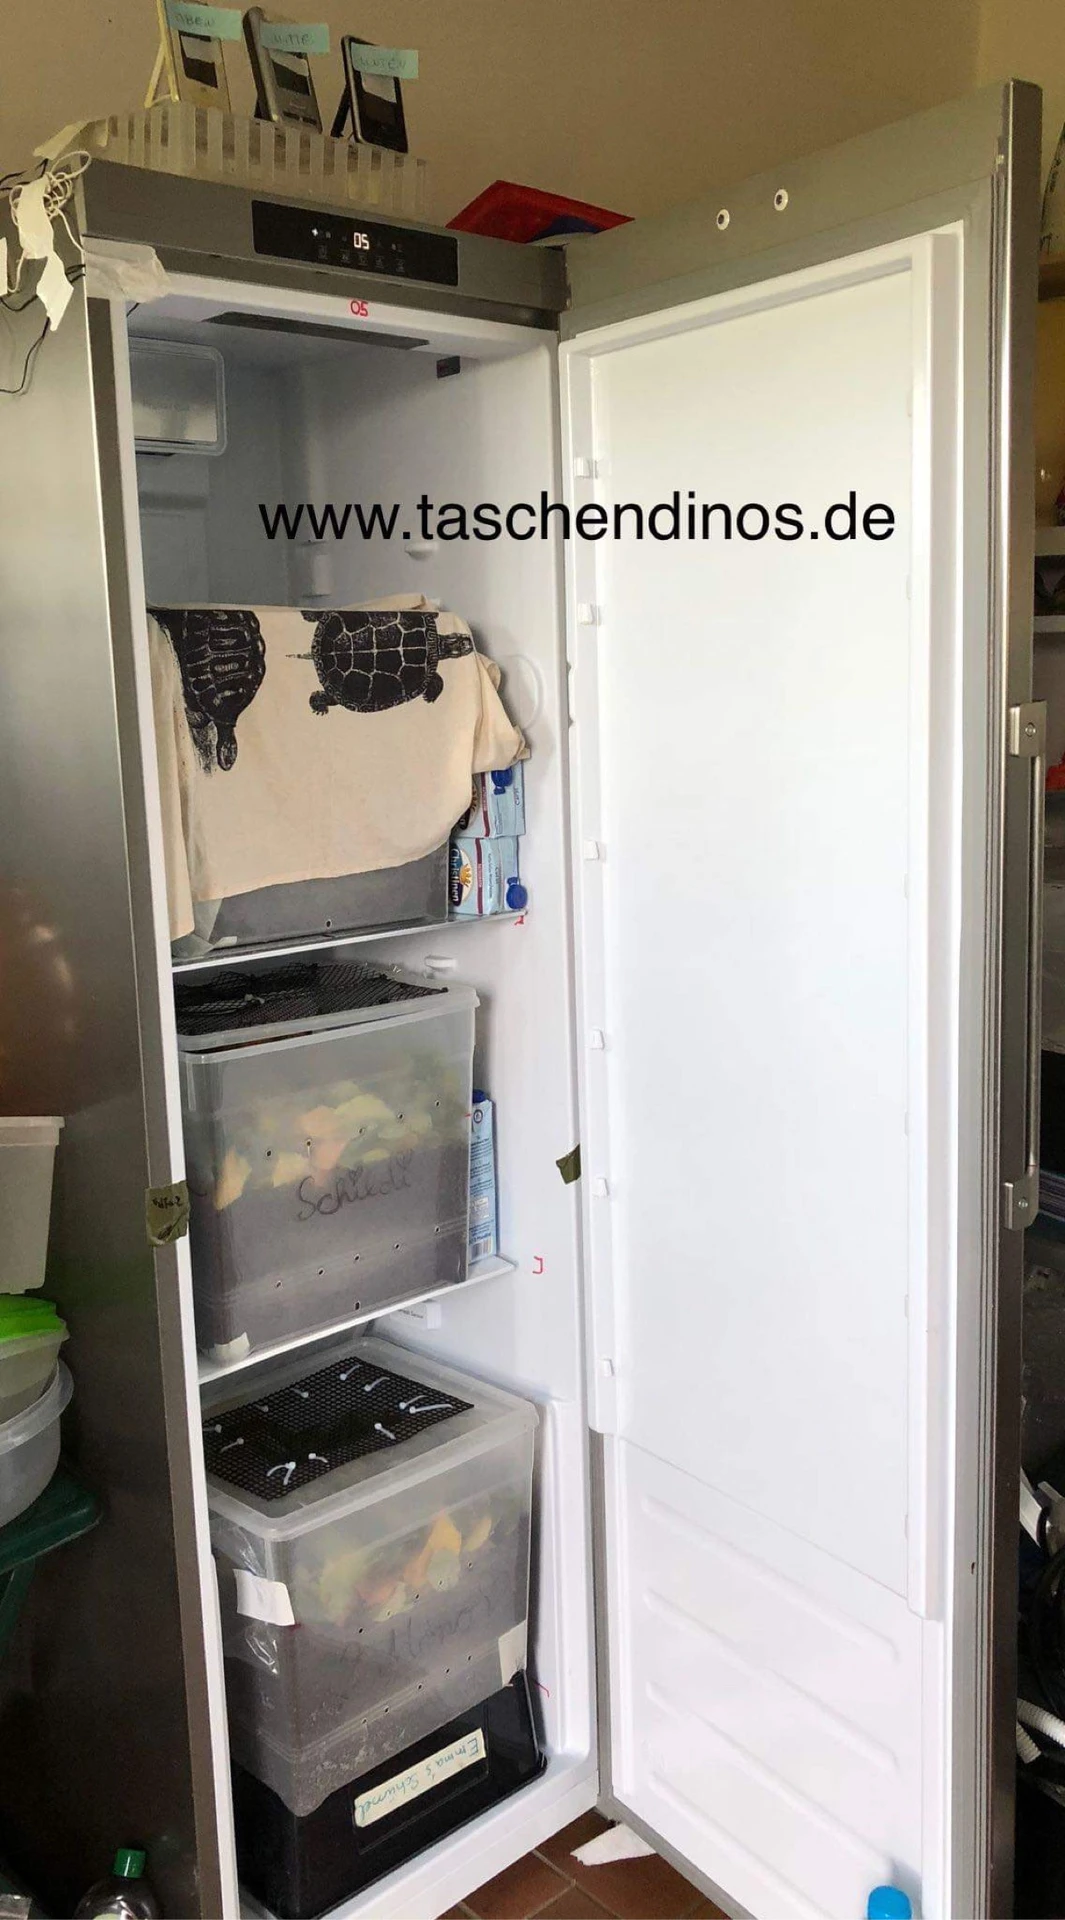
Check the boxes to see whether they are in good condition and the animals still fit into them easily. If necessary, get new boxes. It is essential to make a firmly fitting mesh lid to stop the animals from falling out in the event of a power cut. The animals should be able to turn round comfortably and bury themselves completely. There should be room for three shell heights of soil and at least as many of leaves. Make sure that the boxes do not touch anything in the refrigerator.
The boxes should also be washed out thoroughly and dried.
Substrate
Next, you can already obtain tortoise substrate or sieve loose topsoil.
For beginners, I generally recommend tortoise substrate, as it is ready to use and ideally suited to brumation.
When tortoise substrate is used, cases of overly moist brumation and health problems such as sepsis occur much less often.
Collecting leaves
Next comes collecting beech, hornbeam, or oak leaves. These types of leaves are ideal because they stay stable, do not stick together, and do not go mouldy. It is better to collect more leaves so that you have a reserve. A thick, loose layer of leaves on top of the soil provides ideal insulation against temperature fluctuations. There is no such thing as “too many” leaves. The collected leaves are partly dried in laundry baskets and then stored in a cool, dry place.
Where to place the refrigerator
The refrigerator is placed in a heated room with a constant room temperature of at least 16 °C. Otherwise, the refrigerator cannot work properly.
Caution:
Unheated garages, lofts, and sheds are not suitable, as it gets too cold there and, in the worst case, the animals could freeze to death.
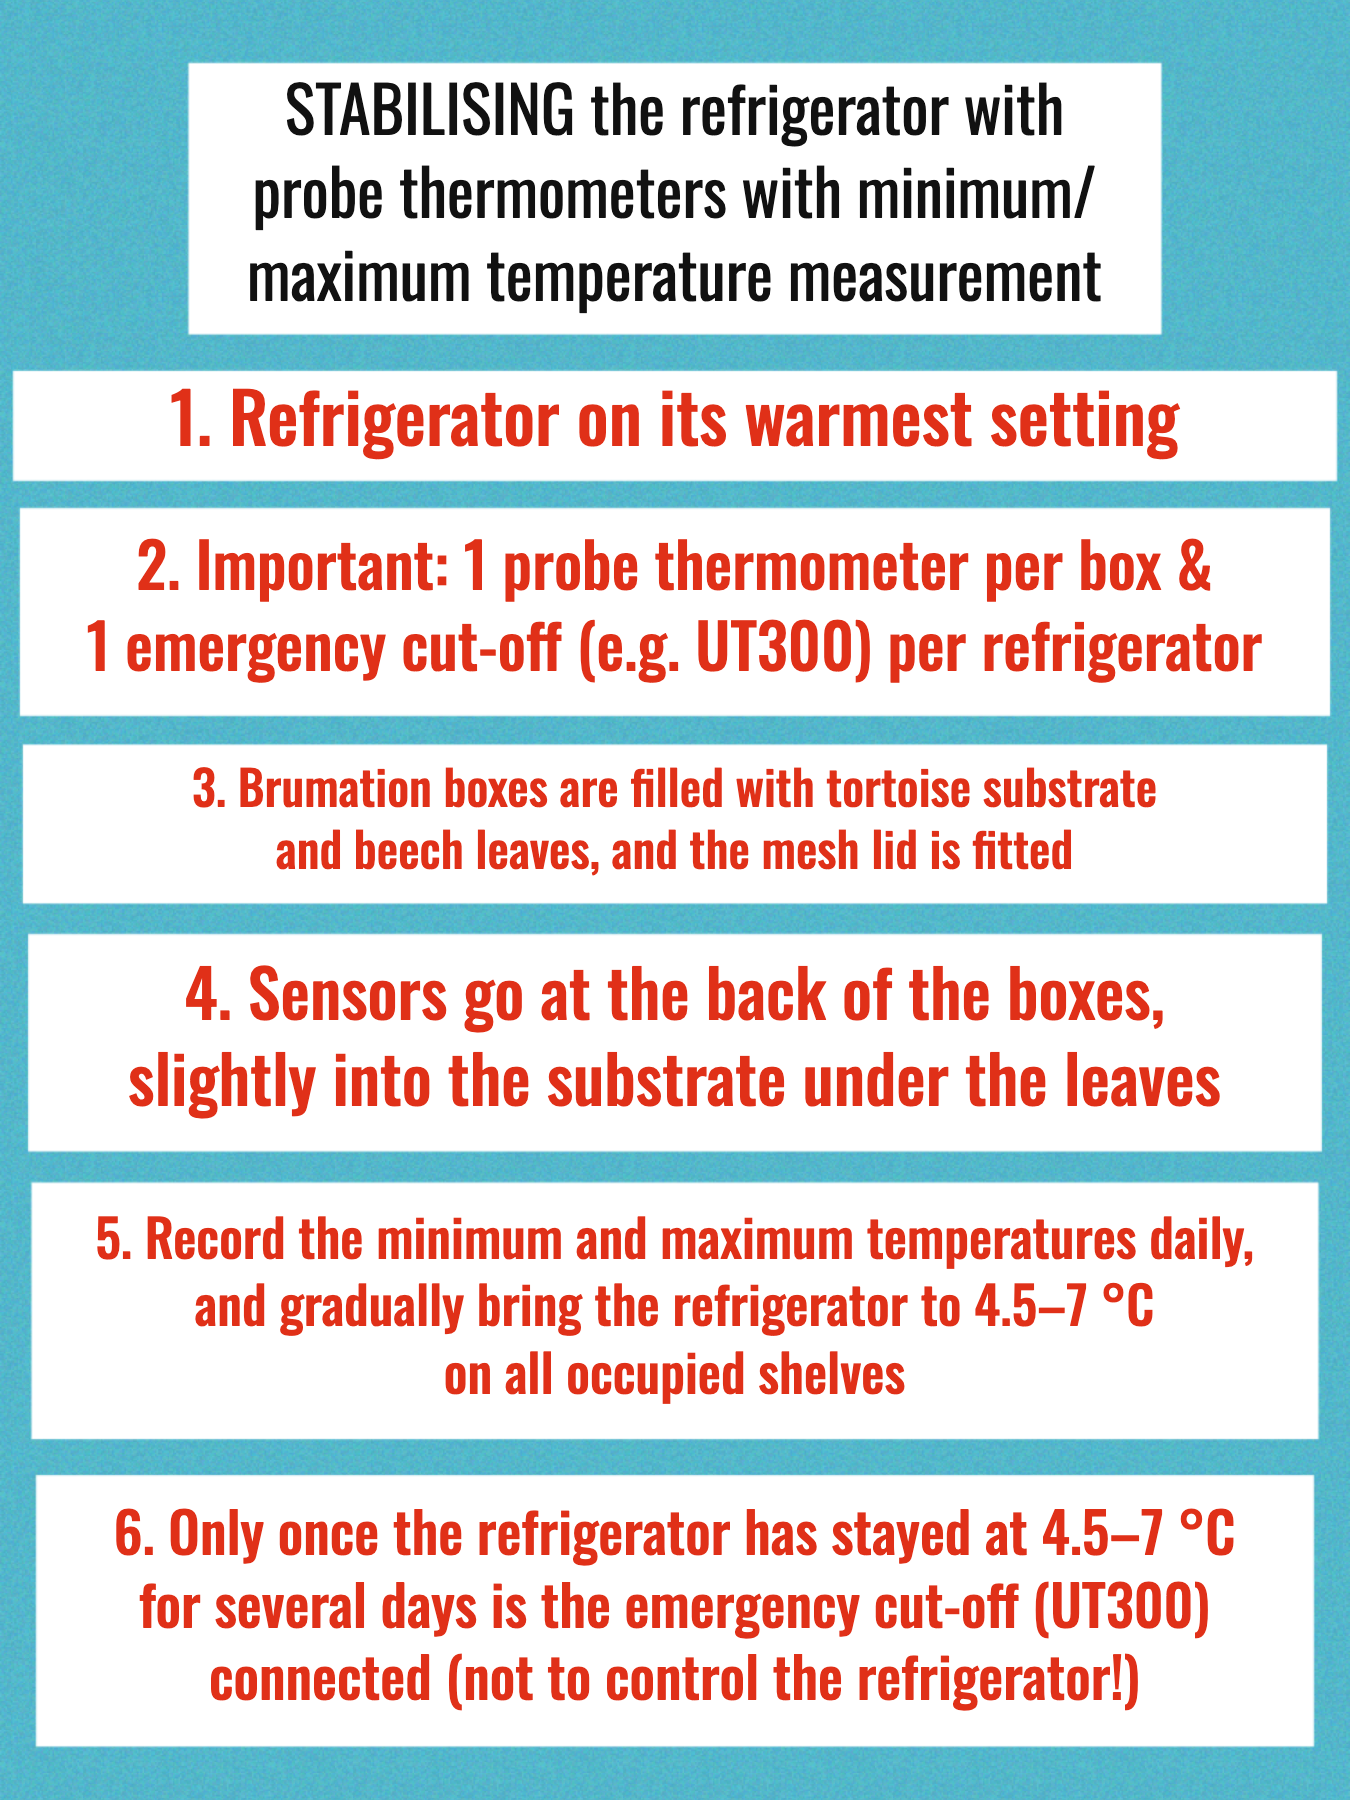
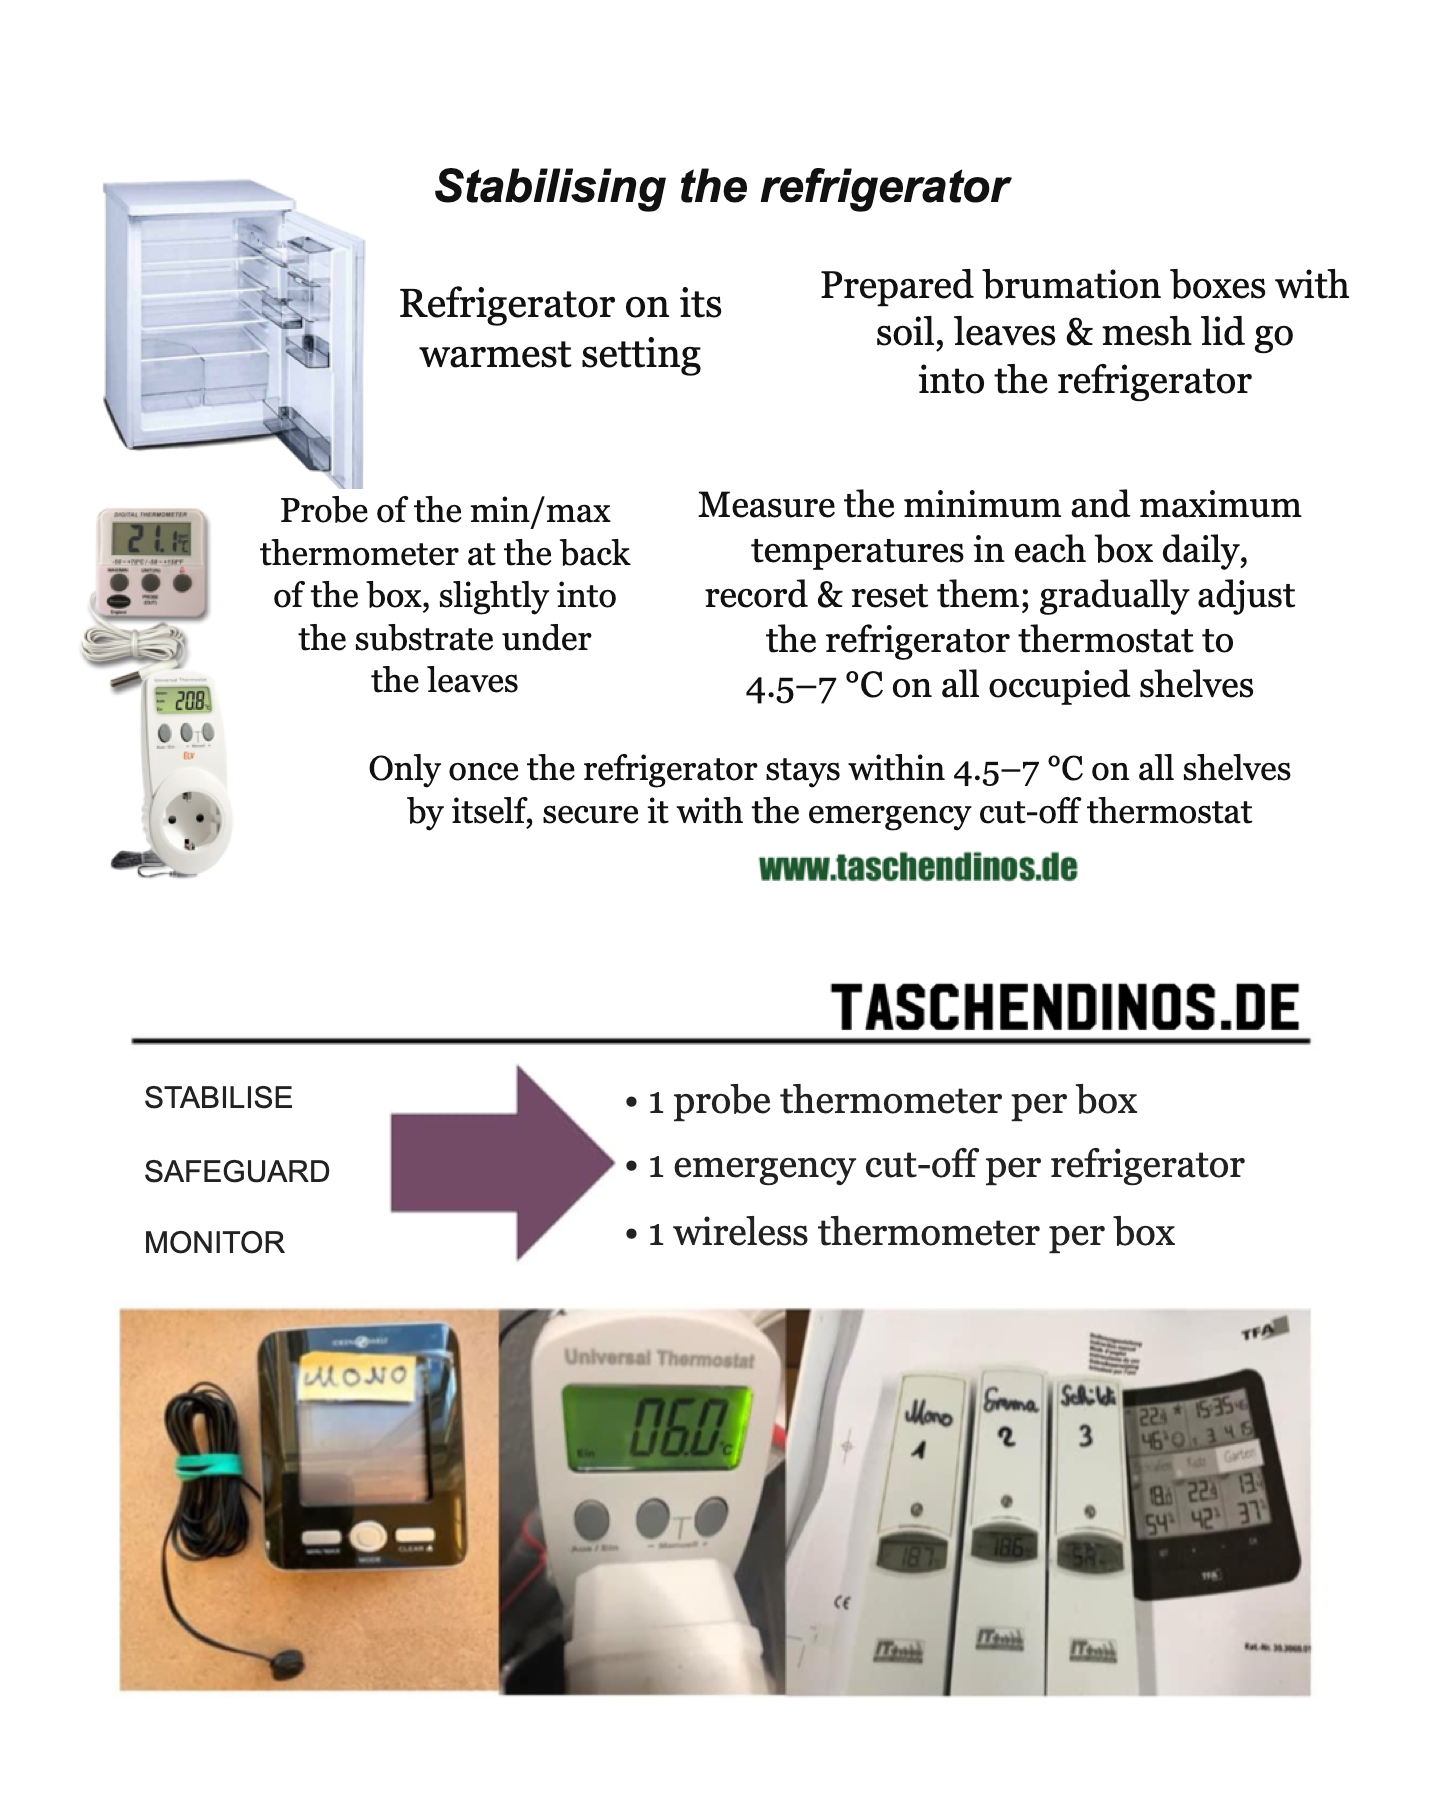
Stabilising the refrigerator in the brumation range without animals
We now prepare the boxes. A thick layer of substrate ensures that the animals can bury themselves as completely as possible. On top comes an equally thick layer of leaves for insulation.
Make sure that the room in which the refrigerator stands is at least 16 °C in winter, as otherwise the refrigerator’s built-in thermostat will not work reliably. This is very important, however, as we need to bring the refrigerator into a specific temperature range.
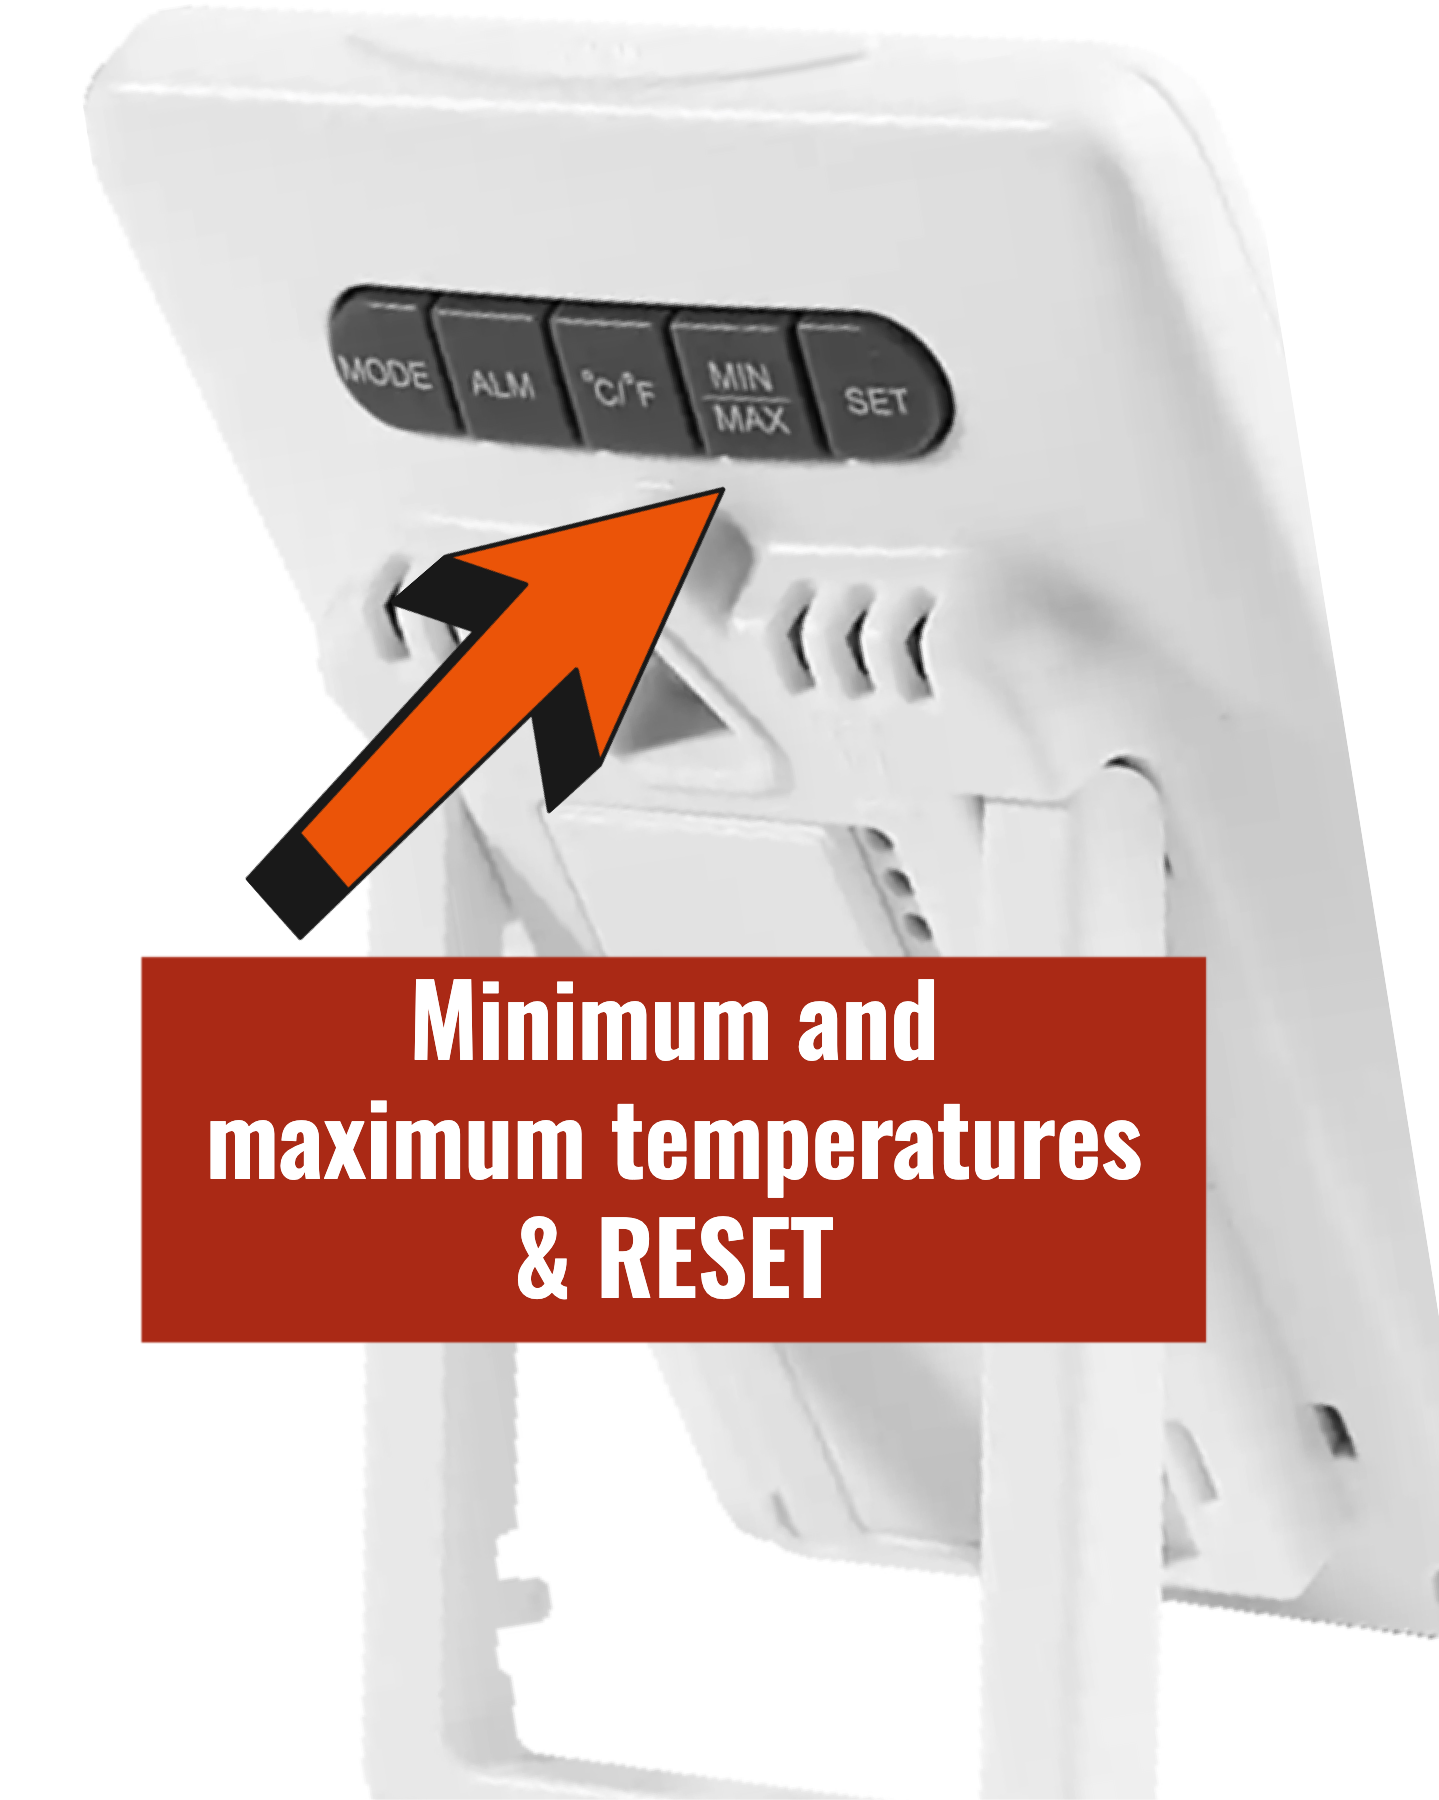
In general, when stabilising the refrigerator, we go only by the temperatures measured in the substrate under the leaves at the back of the box, as this is the coldest area, where the animals are, and the one that needs safeguarding. All sensors therefore go at the back of the boxes. Likewise, once the refrigerator has been successfully stabilised, the UT sensor goes at the back of the coldest box. Always start stabilising at the refrigerator’s warmest setting and turn it down gradually. Record the minimum and maximum temperatures every day and reset the probe thermometer.
A probe thermometer with a minimum/maximum function goes at the back of each box (or one per shelf); record the values and reset it once a day. It helps to attach a small sticky note to each probe thermometer stating where its sensor is located (e.g. top, middle, bottom…). This way, you can see the temperatures on the individual shelves at a glance. If you have sensors from wireless thermometers or WeatherHub sensors, tape them inside the boxes in the leaf layer with outdoor duct tape, or insert them very slightly into the soil. It is important not to tape over the sensor area by mistake. Write on the box with a permanent marker which sensor is in it, to avoid mix-ups. These sensors can then easily be assigned to the animals later. We start stabilising at the refrigerator’s warmest setting and gradually approach the optimum range of 4.5–7 °C by adjusting the refrigerator. Bear in mind the temperature of the substrate, too: it can take several days to adjust to the temperature in the refrigerator. The UT300 universal thermostat from Equiva is not yet connected at this stage. The refrigerator itself should generally stay within the optimum range, with the UT300 serving only as an “emergency cut-off”.
All the information, in a handbook you can refer to at any time: the Refrigerator Brumation Handbook.